 |
3-3: Creating Instances |
|
|
3-3: Creating Instances |
|
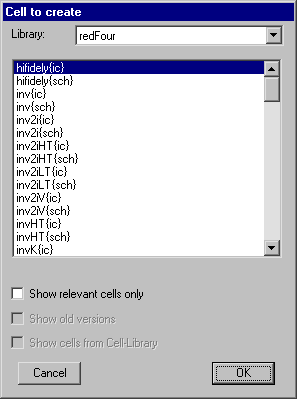 |
Another way to place an instance of a cell is to use the New Cell Instance... command of the Edit menu.
You will be shown a list of cells that are available for creation.
After selecting one, click to create an instance in the current cell.
Three checkboxes allow you to limit the list of cells. By checking "Show relevant cells only" only those cells that have the same view type as the current one will be shown. By unchecking "Show old versions" the list will remove old versions of cells. By unchecking "Show cells from Cell-Library" the list will remove cells that come from a cell library. If you place an instance from a different library, that library will be linked to the current one. Linked libraries are read from disk together, and form a single hierarchy that spans multiple files. See Section 3-9 for more on libraries. |
An alternate way to create a cell instance is to duplicate an existing one on the screen. This requires that an instance of that particular cell already exist. Highlight the existing cell and use the Duplicate command of the Edit menu. Then move the cursor to the intended location of the new instance and click to create the copy. Note that this command copies all attributes of the original node including its orientation.
|
When a cell instance is being created, the cursor points to its grab point. Normally, the grab point is at the lower-left corner, but it can be modified by the placement of a Facet-Center node inside of the cell. To place this, use the Cell Center subcommand of the New Special Object command of the Edit menu. You must place it inside of the cell definition, and it affects the grab point for all subsequent creation of cell instances. | 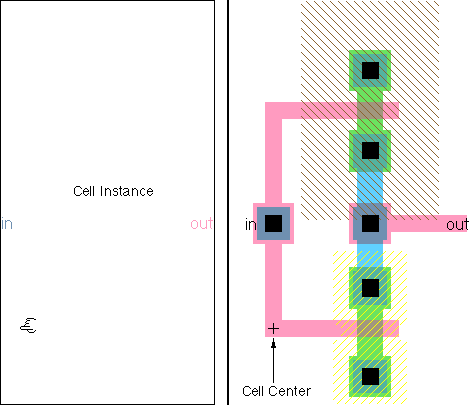 |
 |
Previous |  |
Table of Contents | Next |  |