Chapter 4: Display
| 4-1: The Tool Bar |
The tool bar sits near the top of the screen, below the menu bar. It provides shortcuts for many common commands.

The tool bar has these sections:
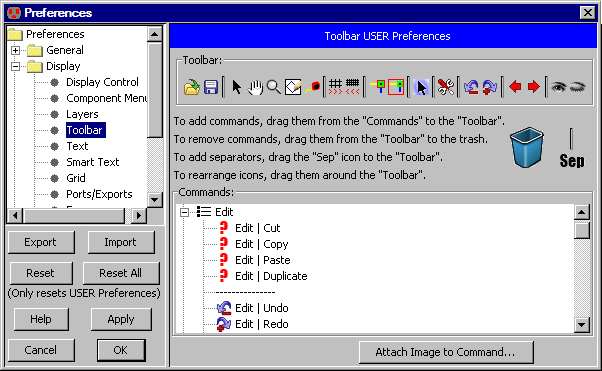
The toolbar can be rearranged with the Toolbar Preferences (in menu File / Preferences..., "Display" section, "Toolbar" tab). An image at the top of the dialog shows the current state of the toolbar. This can be manipulated by dragging icons within the dialog. To add a new toolbar button, drag a command from the list at the bottom to the toolbar image at the top. To insert a separator, drag the "Sep" to the toolbar image. To remove a toolbar button or separator, drag it from the toolbar image at the top to the trash icon. To rearrange the toolbar, drag the buttons within the toolbar image.

Most commands in Electric do not have icons associated with them. You can drag these commands to the toolbar, but they will all show a "?". To add an icon to a command, select the command from the list at the bottom, click the "Attach Image to Command..." button and choose an image file. The image to be attached to a command must be 16 pixels high and will be scaled down if it is larger.
| Previous | Table of Contents | Next |